How to Choose a Polaroid Camera

Posted by on Sep 27 2020

[Note – this was originally publish on Squidoo (now Hubpages) over 10 years ago. I’ve decided to move it as an effort to consolidate content content that I wrote. It was located here: https://hubpages.com/art/polaroid-camera-2 ]

Its been sunny news lately for Polaroid – after going out business at the end of 2008, the Impossible Project has re-introduced the famous line of film again. However, because many different types of film available – it can be very confusing to choose what to choose. I’ve written this guide as quick start guide for those who are jumping into this wonderful form of photography.

I’ve put together this guide to help other on their journey with Polaroid & Instant Photography I hope you enjoy it as much I do!

Choosing Your Polaroid Camera

The main decision to what kind of instant film camera you should choose is based upon what kind of film you use. There are two types – Integral and Pack Film.

Integral Instant Film

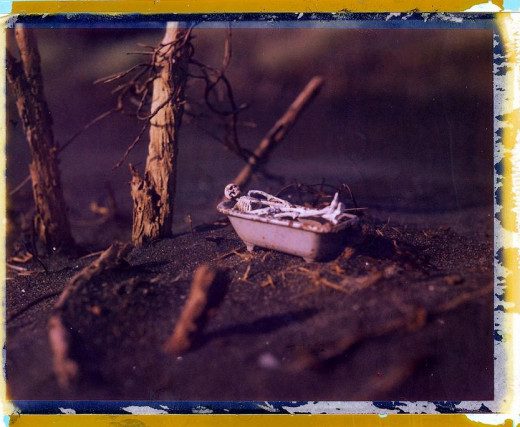
This is the most popular type of instant – the kind that slowly forms in front of your eyes. It was popularised by Outkast’s song ‘Hey Ya’ which the lyrics told user’s to shake it like a polaroid picture. Here are popular types of integral that are available today:

600 integral Film – These are used by cameras such as the OneStep. Click here to see a list of Cameras that use 600 Integral Film. The expired versions of these films are still available today, although quite expensive. These films should be re-introduced in 2010 by the Impossible Project. Ebay is your best bet to find deals on this film. Check out Flickr Photos for 600 integral.
SX-70/Spectra Film – These are used for a wide variety of SX-70 Click here Cameras that use SX-70 Film. The expired versions of these films are still available today, although quite expensive. This film is known for its ability to be manipulated. These films should be re-introduced in 2010 by the Impossible Project Ebay is your best bet to find deals on this film. Check out Flickr Photos for sx 70 integral pictures.
Fuji Instax Wide Format – These are used for Fuji Cameras such as the 210. This Film is NOT compatible with Polaroid cameras, it can only be used on Fuji Cameras. The Wide Format is larger format that Fuji came out to compete with Polaroid when it was in business. Click here for information on this film, and here are some Cameras. This film and camera can be easily found on ebay and other sources. Find Instax shots here on Flickr.
Fuji Instax Mini Mormat – These are business card sized photos that can be only be used Fuji Mini Cameras. Click here for the film information, and some cameras. This film and camera can be easily found on ebay and other sources. Find Instax Mini samples here on Flickr.

Pack Instant Film

Pack Film – Pack Film is peel-apart; you pull the film out of the camera, wait an alloted time and then peel the negative from the positive image. These films tend to used by more often professionals and certain types can produce beautifully sharp and colour saturated images. I tend to shoot more Pack Film today, its just my preference. There are tons of different pack films out there, but I am going to talk about 100 style Pack film here, as this is most common in use today:

Polaroid 669: This ‘standard issue’ Polaroid Pack Film. Find examples of 669 Film here on Flickr. Not being produced anymore but can be found on ebay.
ID-UV: This film had ‘Polaroid’ mark written on it when held to ultraviolet light. Despite being produced for industrial ids, it has own following and is well know for its purple hues and artistic flair. Not being produced any more, can be found ebay. Find examples of ID-UV here.
Studio 125i: This is another Pack Film that has pretty standard look to it, but its excellent to do image transfers. Not being produced anymore, can be found on ebay.
Fuji FP-100c – This the only Pack Film which is still being produced. Sadly, This film is the only pack film currently produced. Fuji film is much sharper and more colour saturated than its polaroid counter parts. It is more consistent than its polaroid counterpart. Polaroid film, especially expired film can be very unpredictable – which makes Fuji Film a better choice when on an important photo shoot. Here are some examples of FP 100c. Tranfers are very difficult with this film.

Here is a master list of cameras that can take the above films: http://www.rwhirled.com/landlist/landfilm.htm#P100

Integral VS Pack Film

Now that you know a little about the film, which is the best for you? Here’s a quick reference (that is completely subject to my opinion – feel free to disagree):

Most people will start out on integral film and graduate into Pack Film. I love both formats, and continue to shoot both. People who have only known digital photography will find that Polaroid is the perfect gateway into film photography.

Here are some great resources for getting started into Instant Film:

Flickr Polaroid Group – pay close attention to what user QueerMountainMan says – he is an encyclopedia of knowledge of all things Polaroid.
Moominsean Blog – plenty of good information on films, cameras and Polaroid experimentations.
RWhirled – Ultimate list of Polaroid Cameras and the film they take. The domain expired, so this is a link back the archive.org files, this is still one of the best resources for Polaroid cameras on the internet.

Polaroid Books I recommend

The Polaroid Book offers a great selection of Polaroid photos to inspire you. The Transfer book is an excellent hands on manual of how to do Polaroid transfers and emulsion lifts. Highly recommended!

The Polaroid Book on Good Reads.

15202483_f520-1202865
Source
15202484_f520-6901418
Source
15202485_f520-4510180
Source

17 years, 7 websites, 965 posts, to one domain.

Posted by on Sep 24 2020

Our internet lives can be incredibly spread out. This my story of my content and how and why I reeled it back to this domain.

Ironically, I had moved away from WordPress over 10 years ago due to a vulnerability in WordPress plugin that hacked the commenting system. This plugin hack poisoned my website to search engines – it linked other hacked WordPress websites with spam ‘Viagra’ links. It was easy to restore the content, but it has taken years to recover from toxic links (note to others: google disavow was not a magic bullet).

At one point this little website got as many 35,000 visitors a month, I put a lot of effort to the content, especially my New Zealand photography, on this website. That all went down hill with the hack. Currently, this sites toots along with about 150-200 visits month, which I am pleased with.

I decided that it would best to spread out my interests amongst a lot of different sites, along certain themes (analogue photography, personal blogs, post apocalyptica).  For the most part, I enjoyed writing semi-anonymously on these platforms, and it scratched a certain itch.  I could write about weird stuff that interested me, and take quirkier photos that didn’t really fit the ‘New Zealand Landscape Photos’ that my site was previously popular for. I still held on to vonnagy.com, thinking that maybe I would use it again.

Here is a history of the content on my websites:

Blogger.com websites.

Blogger was my blogging platform of choice from 2007-2014. I was prompted after my website (this one) was hacked due to a vulnerability in wordpress software that I was using.  I actually still think this is a decent platform; moving from it was more a statement against Google’s survellience capitalism than it being a bad platform.

  • Vonnagy.Blogspot.com – This was my first blog, I used Google Blogger for this, the dates active for this blog are from 2003 – 2008. This was my first attempt at blogging and also came at a time where I was teaching myself a lot about photography. Most of the content is poor, short, and not really worth reading. They are mostly short ‘facebook’ style posts of what was going on in my life. All 94 posts from this blog were imported to my site in September of 2020.
  • Portwaikato.com – This was a themed blog, first hosted on drupal, then on blogger. It documents my photo outings to Port Waikato – active from 2005 to 2009, when it was imported to blogger.com. Click here to see my Port Waikato Blog and Gallery . 95 Posts from this blog were imported here in September of 2020.
  • Zegarkus.Blogspot.com – This was an anonymous blog that I started in 2007 and did my final post in 2013.  The name came from my friend who called me ‘Markus Zegarkus’. This was a more serious attempt at blogging, there are some posts there that I am proud of, other posts which were pretty silly. I did own a domain for this but I let it lapse and it got picked up by a domain spammer. Click here to visit the zegarkus blog. I imported 118 posts from this blog in September of 2020.
  • Parahanga.com – This is my New Zealand analogue photography blog – active since 2009. This was hardest decision on whether to import or not, because I loved this as a stand alone domain. However, I wanted to make my life simpler so I decided it best lived here. Some 177 posts were import here. It is still active, the domain parahanga.com now lives at https://vonnagy.com/parahanga/
  • ApocalypticPost.com – This was my first themed blog – I was really into (and still am!) the Post Apocalyptic genre! This blog was active from 2009-2017. Apocalyptic Post can be found here on my website.128 posts where migrated here

Static Websites.

I had two websites that used a static website generator. These were fun to manage, they were simple, however, at the end of the day I thought

  • Kraxn.io – Similar to above, this was a blog I created in 2018 for art projects, including a year of sketches I made with the sketch a day app. I also used this blog to do some technical posts on some programming languages I was experimenting around with. The last post was in April of 2020.  Kraxn is Viennese slang for a old car, machine or device that is barely operable. See my entire year of sketch-a-day drawings, and visit the blog here. This was my biggest import into the site, roughly 375 posts migrated here.
  • Asylon.org – This blog came forth as a long reflection in technology.  Asylon comes from the Greek word sanctuary: It combines the prefix a, without; and sŷlon, right of seizure. It means all which can not be seized or plundered. This blog was active from 2019 to early 2020, there were only 10 posts, but the they were all long, in-depth articles. Go to vonnagy.com/asylon to read more.

Other platforms:

These were other platforms. For most of these, they were not really worth pulling into this blog – the content simply was either too bland or it already existed in some form on this website.

  • hubpages – I imported a couple of articles about photography from this platform. This site used to be known as squidoo, it was interesting when I first tried it, but its another platform.
  • geocities – I did have a couple of pages on Geocities, but it was mostly nostalgic, I decided not to import them here though they are currently found on OOcities. These date back to 2004 –
  • flickr – Most of my photos from flickr are already here, so there wasn’t so much to do. I haven’t decided whether .
  • polanoid.net – Sadly this Polaroid site is mostly dead and inactive. Many (amazing) photographers have withdrawn their accounts. It used to be prestigious for its ‘Shot of the Day’, but it is a sad former shell of itself. Most of my photos there already live here.
  • Facebook – I deleted my account in 2016 but I didn’t have any worthwhile, except a profile picture worth migrating over here.
  • Twitter – Same as above, I don’t have a twitter account anymore. I think I only had 3 or 4 tweets.
  • Google + I actually used this for some travel photos, but removed my account before it shut down. Nothing to migrate.
  • Tumblr – I had a personal account I used to reblog things from work and some of my photos. These photos were already on my blog and the work content was not really worth bringing aboard here.

Lost forever

There are some the unhappier moments from this great consolidation:

  • PolaroidPictures.org – unfortunately there was not even an archive.org backup of this. I had dedicated several thousand words to practical polaroid photo taking here. I had it hosted on Google sites; when I deleted my Google account for the site, I completely forgot that I had this content there. This is completely my fault, I didn’t plan to make any backups. I know I put several months of work into this project, but got sidetracked. C’est la vie.
  • PhotoBucket – I had a photo account which became got lost when PhotoBucket got new management. There were a few digital photos that I didn’t have a proper back up, and when photoBucket changed hands, these were lost. In particular there was a shot of horse from a wedding at the Savage Memorial near Mission Bay that I really liked, but is gone forever. Rest in peace.

Post Mortem.

In 2019 – I started blogging again, mainly spurred on by my 365 day sketch-a-day project. I also created new site asylon.org about my interest (against) capital surveillance. Not long afterwards, I started to tally my projects and realised they were just all over the show. Secondly, while I didn’t write anything controversial, I didn’t feel comfortable having my blogs hosted by company mired with poor history privacy (Google). So I began thinking about moving them again to a central place, making them easier to manage. In this case, vonnagy.com.

However, my site vonnagy.com has been on wordpress since 2015. While I did have some content on the website, I just thought of it as a holding page. Fortunately, wordpress is much more security oriented than it used to be. Also importing from blogger has been breeze. The worst bit was importing from another wordpress site; most of the lauded migration tools are just bloatware. After trying 5 different plugins, I reverted to a manual import – which took me all of 10 minutes, and worked perfectly.  All 7 sites were imported during September of 2020; representing 965 posts spread over 17 years. Not bad.

This massive import reflects a tiny slice of internet history ranging from Geocities to Blogger, from Facebook to Flickr. It feels good to be (mostly) independent of these companies though while it can be daunting to have ‘all the eggs in one basket’.  Now that everything resides here, it will certainly be easy to manage – where possible all of the former domains redirect to the appropriate page here on vonnagy.com

From a personal viewpoint, it was really fascinating to see what interested me over the years, and many times I probably wouldn’t agree with my former self. It’s also interesting to view my posts as a timeline of my life. Here’s a quick yearly breakdown – its interesting that 2019 and 2009 were my most productive years, accounting for 70% of my posts the last 70 years.

Year Total Posts
2020 23
2019 371
2018 7
2017 1
2016 1
2015 4
2014 1
2013 4
2012 16
2011 27
2010 64
2009 305
2008 38
2007 30
2006 20
2005 28
2004 28
2003 3

Here’s to a few more years of writing and being active on the internet; technology changes, and perhaps the world wide web will even cease to exist in less than 100 years time. These pages will become digital relics, while this author will happily fade into oblivion.

header for parahanga.com, my film blog


apocalyptic post, my apocalyptic themed blog.


Portwaikato – my first themed website/blog


Vonnagy.Blogspot, my first blog


Zegarkus – my first serious attempt at blogging


asylon-logo2

logo for Asylon, a privacy blog


Develop your own film

Posted by on Sep 21 2020

[Note: this was an unpublished article from Jan. 2015 I had on Hubpages, I’ve decided to go ahead and publish it here with a few minor corrections]

Why not develop your own film?

As an avid film photographer, I am quite happy to see rebirth of analogue photography such as Polaroids (see my related article on choosing Polaroid Cameras). However, a recent purchase of Holga Camera left me scratching my head. The instruction said to take the film to Lab to get developed. One of the great joys of film photography is developing your own film negatives. Its every bit of fun as taking the photo!

Sadly, more emphasis is placed on taking the photo and entirely neglected on the developing the photo. Would you really trust a lab with your treasured photos? The myth is that developing film negatives is a hard process and requires a darkoom. The fact is, that is its a fairly simple process. In fact it sometimes less time and effort to develop a batch of film that it takes to grade some digital photos in photoshop! And with certain film development tanks you don’t even need a darkroom.

One of the most amazing experiences of photographer that I’ve experience was developing my own negatives. Its quite a magical feeling to know that blank roll of film has now produced images that you’ve taken!

Here are some simple things you’ll need to get started, aside from the chemicals and development tank, the rest of the items are household.

  • A roll (or rolls) of exposed film
  • A Development Tank or Daylight Box like the Rondinax
  • Chemicals (can be bought individually, or in kits).
  • Running Water
  • Fridge (for cooling chemicals – black and white film)
  • Hot Water (for warming chemicals – colour film)
  • A thermometer
  • Beakers/Measuring Cups for chemicals
  • Bulldog clips to hang your negatives.

Here are some other things to consider about film development

  • You can not ship film chemical outside of the USA, which is not problem if you live the USA. If you live outside of the USA, I found that the United Kingdom is a very good source for chemicals. Regarding shipping from the USA, the above what most photographic stores have told me; however I think it has to do more with volatility of certain chemical compounds such as silver nitrate and other potentially unstable compounds. I
  • Though the principles of developing black and white and colour films are the same, colour film requires more rigorous temperature control.
  • You can reuse the chemicals, although each use degrades your chemicals.

Black & White vs Colour Development

What I am about to say is a simplification, as there are more than one to skin a cat, or do film development. Below is very general, as to give an overview. ALWAYS read the directions on chemical themselves.

Black and White is the simplest film to development as you only need cool water – this is typically between 20 and 22 degrees Celcius (68 to 72 degrees Fahrenheit). Generally its:

  1. Place film in light proof box
  2. Pour in the developer and agitate at the right temperature for set time. This is what actually exposes the film.
  3. Pour in the fixer and agitate at the right temperature for set time. This is what stops development and sets the image
  4. Final Rinse and let negatives dry.

There are several variations to the above. When I did my first roll of black & white film I actually skipped step three because I had no fixer. There are several different types of chemicals. Also there are several protective rinses you can use after final rinse.

Developing with colour film is similar, but may have extra steps. Below is for common colour negative film known as C-41. The difference being that this uses hot development temperatures instead of cold.

I feel that there is alot of misinformation about colour film; most forum experts scream that if you don’t get your development done at 36 degrees your film will fall into shambles. I’ve development hundreds of rolls over the past few years and found that colour film is very very forgiving. Yes – don’t get sloppy and go for a few degrees off the mark. I but I found that that up to 2 degrees off the prescribed instructions will still render quality results!

[note this is where the originally article ends (I just ran out of steam!), however I would encourage you to check out my article ‘Zen and the art of Rondinax  Developing‘]


Shooting Miniatures, a primer.

Posted by on Sep 12 2020

One of the great joys of taking photos is shooting outdoors, and even more so, seeing all the worlds it opens up.  Sometimes you see rocks and landscapes create perfect tiny worlds, or as Blake said ‘To see a World in a Grain of Sand‘.  Here are a few things that have helped me shoot miniatures over the years.

Choosing the your models

Most of models I’ve used are either HO scale or 1/18 scale. The sizes come with their own advantages and disadvantages; however the scale should fit the scene (landscape) your shooting.

1/18 – or action figure scale

actionfigure-6808449

Action figure shot underwater near Matakana. 35mm film.

These are commonly between 3.75″ to 4.00″ inches tall. These are great for starting out as they have to some advantages: the limbs are flexible, there are many accessories available, and you likely will not a macro lens – just a regular should work for most of these figures.

Having flexible limbs means you can set up different poses and neatly fit them in many different situations. You can also configure them to interact with other action figures (eg shaking hands, dancing etc).

In addition, there is a plethora of accessories available – including a wide range of dollhouse furniture.

The larger size also means you will not  need a special lens to shoot them; in fact I never used a macro lens or close up filters for this scale.

There are few drawbacks:

  1. Price – these models tend to be pricier, and the accessories even more so. You might be able to pick them up cheaper at thrifts stores, but there were several times I wanted a very specific piece for a shot, and the costs can rack up!
  2. Limitation on styles – Many action figures don costumes, so its harder to find figurines that are not in super hero, fantasy, or military garb.  I have not checked recently, but female figurines were also more difficult to come by
  3. Lack of detail –  This is especially seen in the joints such as elbows or knees, having a visible screw sock can easily destroy the intention of making a scene look realistic.  This is where finding the right perspective becomes important. With film, grain and the beautiful imperfections of Polaroid film go a long of masking some of these faults.

HO Scale – or train model scale

hoscale-e1599941487113-9965900

ho scale, polaroid 125i film. Swirls are artifacts of expired film. Snell’s Beach.

These are tiny figurines and models that come with trainsets. These have and advantage in there there is so much variety to choose from, I get giddy when I go online or walk in hobby shops when I see the possibilities.

Unlike action figures, these come in a dazzling array genders, outfits and possibilities. You can also larger set pieces at good prices – these can include houses, vehicles, animals, trees, and even miniature electric lighting! You can spend hours looking at HO scale models and accessories on eBay!

Unlike action figures – the models do not have flexible limbs, so the pose you get out the box is the pose you are stuck with, unless you want to modify them.

In addition, these models are tiny! These figurines can  range between .7 inches (1.78 cm) and .83 inches (2.10 cm) high. The HO scale is 1:87 scale in size; for reference a 6 foot tall person would be 72 inches (183 cm) divided by 87 inches  (221 cm) – or approximately .83 inches.

At this size, shooting with a default lens (even 50mm lens on film) can challenging. With film, I typically always use a close up filter or macro lens, with the exception of when I use my large format 4×5 camera.

Here is a quick comparison chart of the scales:

HO Scale Action Figure Scale
Price Generally Lower More Expensive
Variety Great variety Less variety
Posable Fixed pose Variety of poses
Camera Likely needs macro Almost any lens

Is one scale better than the other? Definitely not! It depends on ‘landscape’ they are situated in.

Setting up the outdoor scenes

I generally like to find miniature landscapes that could be mistaken for ‘life-size’ landscapes if you use the correct perspective. I am fortunate that I live close to several beaches that provide ample opportunities for such locations. These scenes typically have unique rock formations, tidal pools, or micro vegetation (such as moss) that can be used for a bit of Trompe-l’œil.

Some examples and explanations:

Below: This was shot on a black sand beach with 1/18 scale model. There was a piece of buried driftwood that mimicked a decimated forest in the dunes of Whatipu.

skeletonbath-7511982

skeleton bath, polaroid packfilm

In this shot, I intentionally used a short depth of field to blur out the subject. The foreground was actually sea moss on top of a small boulder, but it looks like clumps of mowed grass. This was with an HO scale model figurine.

millsbay-3801606

mossy, foreground. Polaroid Packfilm

In this scene, a 1/18 figure action figure pushes a stuck vehicle out of a small stream, in this case a tidal pool on one of Auckland’s west coast beaches (Armour Bay Reserve).

pushit-9343883

tidal pool push, Polaroid Packfilm

Surreal landscapes can be found anywhere. This HO scale figurine is wearing a Hazmat uniform as he ponders the alien landscape in Sandspit, Auckland. This was taken on a weather-beaten rock nub during low tide. Incidentally the yellow line running on top of his head is an artifact of the expired film, not post processing.

alien-landscape-2027161

sureal landscape, polaroid packfilm

Its important to not forget about perspective. Here are two shots I took of a miniature gondola shot at Mill Bay in Auckland. The first shot I didn’t consider the background and the  scale of the trees, making it less unsuccessful as a Trompe-l’œil photograph. The second fairs better in this regard. These where shot with 1/18 scale action figures.

trompe-loeil-fail-6584602

unconsidered perspective, polaroid packfilm

better-4499712

Note not every outdoor miniature needs to have a perspective in reality, this is one my favourite shots, influenced by the German painter Michael Sowa taken at Cornwallis Beach in West Auckland:

sowassuppe-2773126

Pig Soup, FP-100c Silk Film

Shooting in a studio

When I say studio, I really mean a cramped, makeshift office (you work with what you have!).  Generally, its not normally my thing to indoors, but I was very curious of how this would work since I loved the work of artists like Lori Nix and Kathleen Gerber who made beautiful elaborate sets.

My shots were a little less elaborate but did make use of a few materials an creative staging.  Here was my set up for most of the shots:

  • A computer screen with a photo for my backdrop. At the time I had Mac computer – and the photos for the backdrop where from my collection of digital photos over the years.
  • A prefabricated foreground. Usually I used a piece of polystyrene that I had molded to my needs. Other times I used store-bought  ‘fake grass fields’ (which rolls of fuzzy green paper) .
  • My Horseman 4×5 camera with a Polaroid back. Because of the flexibility of bellows, there was no need for a macro lens or enlarging filters.
  • A set of LED lights to brighten the scene.
  • HO Scale Models – because of my small set up, having a smaller model worked best here.

Examples and explanations:

The picture below was one of my first efforts. I used a photo from Bethell’s Beach as a back ground, the foreground was piece of polystyrene. I used spray glue to put black sand as the earth, and stick that looked like a tree for the prop that my HO figure leaned up against.

dreaming-tree-e1599947706524-9497077

dreaming tree, fp-100C film

lighting_dunes-300x200-2200727

bethels beach background image for dreaming tree.

This next photo uses a background I shot from Raglan, New Zealand. The green grass is a actually a roll of fake grass I bought at a hobby store, and HO figurine mowing the grass.

mowbody-888x1024-1064435

Mowbody, FP100C film

green_sunset-300x225-7137069

background for mowbody, shot near Raglan

Finally not all my miniatures were HO Scale or 1/18 – I had a 1/6 scale doll (about 12 inches/30.5 cm) that was part of a test shoot for Outlier Cartel. Of all the images here, it was the only shot on digital.  Since this model was bigger, I used my television as a backdrop. The background image is from the Fallout4 video game. Lot’s of little props here include kumera, a mailbox, beer bottles, a gasmask and more. Surprisingly this was a lot harder to shoot because of the lighting requirements and perspective. While I liked the shot, I wanted a lot more landscape in it to give it a sense of scale. In the end, we opted to hire Lori Nix and Kathleen Gerber to do the shoot for us, and it was a winner.

apocalypticpost-1024x683-1909103

apocalyptic post, digital

Final thoughts

There is of course, a lot more to shooting miniatures than what I listed here. I love shooting miniatures, particularly outdoors because it forces you to examine your surroundings more carefully. Overtime you come to notice the world is full of delightful landscapes, large and small!

As for influences,  I draw inspiration  Tatsuya Tanaka, Lori Nix, and Kurt Moses. In addition, as a kid I also thoroughly enjoyed playing with action figures outdoors (some would have been worth quite a bit money had I taken care of them). Part the fun of shooting miniatures is getting to be a kid all over again!

ravine-6645346

ravine, 35mm


The Kiki and the Google

Posted by on Sep 08 2020

This is a short story, or rather puzzle, that I recently rediscovered in an old children’s book. The book is the 1982 Childcraft Annual called the “Puzzle Book” published by World Book, Inc. The reason for this post is for the delicious use ‘Google’,  15 years before the company was formed. The Google business name was a misspelling of the name ‘Googol‘, but the company decided to stick with the misspelling instead. Perhaps they would  have reconsidered the name had they known this story!

I am including part of the story here – the actual answer to the riddle/puzzle will be left in the book – so you’ll have to find the book to know the answer (or figure it out yourself)!

Captain Laura Blazer, the Space Ranger, was in trouble. She was lost on the planet Raz. Her scout ship had run out of power and come down on an unknown part of the planet.

Caption Blazer could call her base on the radio. If she could let the base know where she was, another ship could be sent to rescue her. But she knew only that she was in the forest where the creatures known as Kikis and Googles lived.

Not much was known about these creatures. They were intelligent, and could talk. But, for some reason, they never answered more than one question from a stranger. It was known that while Kikis always told the truth, Googles always lied.

Captain Blazer had never seen a Kiki or a Google. But she know they did not look alike. And she knew that the land of Kikis was in one part of the forest and the land of the Googles in another part. If she could find out which country she was in, she could let here base know where she was.

She began to walk through the strange forest. Suddenly, she came face to face with two odd looking creatures. One must be a Kiki and the other a Google. But which was which?

Because she was a stranger, they would answer only one question. One of them would lie and the other would tell the truth. What one question could Captain Blazer ask that would let her know whether she was in the land of the Kikis or the land of the Googles?

(answer on page 167).