Go private, go blockchain, or roll your own email

Posted by on Mar 14 2020

Email is an interesting beast. Many people, even those with considerable technical abilities shy away using anything but a big tech email provider. The majority people use Google – which its a classic gmail address, or with touch more configuration, set up their custom domain with Google. There are still more than a handful that go Hotmail or Yahoo. The last smattering goes to various other email providers.

Email is an interesting beast. Many people, even those with considerable technical abilities shy away using anything but a big tech email provider. The majority people use Google – which its a classic gmail address, or with touch more configuration, set up their custom domain with Google. There are still more than a handful that go Hotmail or Yahoo. The last smattering goes to various other email providers.

Here I’ll go over the consequences of using that free email account and 3 alternatives to consider.

What are the consequences of using big tech email?

We use big tech email because its free and convenient. But this mean to us, and our privacy? Here are 3 simple reasons not use big tech emails:

You data becomes their fodder. Yes Google allows you check and remove your data at any point. This is a moot point. Its essentially like giving your personal diary to your sticky-beak auntie for safe keeping just because she’s got a nice mansion to keep it secure. You can retrieve it anytime, and its certainly yours, but who’s to say your Auntie didn’t readcopy and distribute your diary! While you might own your data, you don’t control it!

Big players make them big targets. We often worry about hackers lurking in dark basement tracking your online behaviour. These days. Hackers are less individualistic and have become massive state players. China, Russia, USA and many other countries have been complicit in massive data breaches. Data is most valuable commodity, and if there is a dragon hoarding this gold, you can bet that they are troupes of rogues that are systematically looking for ways to pilch these huge reserves. The biggest breach in history so far has been Yahoo, and the attack, though technical, relied a lot on human error.

Spam – Free email providers are often trapped in spam filters simply because they are free, and can be used by spammers. Even if you have never distributed your email to anyone, spammers have vast tool-base to guess emails. For businesses, reaching out to free emails accounts can be problem as well.

There are plenty more reasons. Lets look at 3 solutions

Get Privacy Focused Emails Provider

There are several free and paid privacy email providers. I’ve selected 3 below for having strong security and being in a jurisdiction where there is user privacy is more protected (this excludes nearly all English speaking nations). For more on this read about Lavabit.

In addition, being open source is important, it gives an opportunity to how their data is handled;

Protonmail is Swiss based email provider and is the first name that usually comes for privacy email. Although Switzerland is not under the jurisdiction of the GDPR, they have strong legacy for privacy, both in business and culturally. Some features of Protonmail.

  • Encrypted with AES, RSA, and OpenPGP
  • Free Accounts get 500MB of storage and a limit of 150 emails per day
  • Paid accounts get more features starting at 4.00 € /Month, this includes using your domain (eg like mark@asylon.org) for the account.
  • Is open source
  • Has IOS and Android Apps

Tutanota is a German based email provider. Germany is under the jurisdiction of the EU, which means the strong protection of the GDPR are in place. Here are some features:

  • Symmetric (AES 128) and asymmetric encryption (AES 128 / RSA 2048) to encrypt emails end-to-end.
  • Free accounts get 1 Gigabyte of storage.
  • Paid accounts get more features starting at 1.20 € /Month, such as getting your own domain.
  • Is open source.
  • Has Android App.

Mailfence is a Belgium based provider, this also puts them in the jurisdiction of the GDPR. Some features:

  • Encrypted with AES-256
  • Free accounts get 500 MB and 500MB in Document storage
  • Paid accounts get more features starting at 2.50 € /Month
  • Is in part open source, using the OpenPGjs library.

One of the features is that the free services offer a lot less space than the big tech accounts, but the trade-off is more privacy.

Get on the Blockchain

This is not one I would recommend, yet, however, there is a lot of promise here, and it contrary to popular belief its not just hype. Currently I not convinced this technology is going to be mature enough for many users.

In short, these emails can be easily accessed through web, but the data is not stored on a central server. These are know as dAPPs or ‘decentralised applications’, and your data is distributed encrypted and secure in the network, instead of being controlled by a central authority like a government or corporation.

I have limited experience with these, but given enough enough users will be huge threat surveillance capitalists. Currently the top blockchain networks for dAPPS are the Bitcoin and Etherium networks.

One to investigate is Blockstack.org and Dmail. Blockstack uses the Bitcoin network for creation of blockchain applications, and Dmail is an app that resides on it. What’s great about it is that it has all of the same tools you would expect from Google ranging from your own online storage, email, even maps.

However, I can not recommend it at this point, because as much as they talk about privacy, there privacy policy remains spotty at best. As of the time of writing this, their actual online privacy policy is an unreadable document (archive.org link).

If you are an early adopter, it would worth keep your eye on different blockchain networks.

Rolling your own server.

There is stigma is that email is hard. Over the years, I found that most of the programmers I knew had their own personal websites, but very few had their own mail server. They know doubt had the technical ability to set one up, but always defaulted to out of the box solutions (eg gmail). Upon querying my programmer friends who didn’t host their own email the responses were similar across the board:

  • Its too much maintenance work.
  • I’ve already got a free [gmail/yahoo/hotmail/wundermailingus] accounts

These are not actually excuses. Not to denigrate myself, but I don’t nearly have as good technical chops as the people I work/have worked with. I have been fortunate to work with some of the most intelligent technical minds around the world the last 20 years. If I can do it safe and securely, so can anyone.

First, after hosting my own email, I found that if configured correctly, its no less work than hosting your own website. Maybe a little more, but not that much more. Secondly, people have moved from one free big tech account (yahoo.com, hotmail.com) to others (gmail.com) previously, so this

There are many tutorials out there now about how to set up your server. If you go this way, I see 2 different paths to take: Setting up an email server on your own dedicated server; using an open source hosting control system. Let’s look at each option.

Dedicated Email Server.

Below is a very simple overview of what is involved with setting up an email server. As you can see its pretty involved, but can be tackled in a systematic approach:

  1. Getting your own domain name.
  2. A hosting server (more than likely using a flavour of Linux)
  3. MTA – Configuring a Mail Transfer Agent – This the technology that involved in sending the mails. Postfix is a software commonly used for this.
  4. MDA – Configuring Mail Delivery Agents these get emails from server delivers them the users’ inboxes. Dovecot is a software used use for this.
  5. A Spam Blocker (SpamAssasin)
  6. A database (Postgre/MySQL/MariaDB)
  7. A webserver (Apache/Nginx)
  8. A webmail client (roundcube)

Although a few years old, this Ars Technica article is an excellent start for setting up your own email server. Even if you don’t go this route, its an excellent read to understand each component that is required for your own email server.

An another very popular solution is a bundled software solution that care of several of the above steps for you. One of the most popular programs for setting up your email own email is Mailinabox.com. This application includes a precise step by step guidean install video, and discussion forum. There are other solutions out there as well, such as iRedMail and Modoba.

Hosting Control Panel.

Unlike the above, a hosting control panel handles nearly every aspect website & email hosting. The learning curve is slightly less, however there are many more moving parts that go wrong! If you already own a few websites, then this might be the best solution. There are two open source control panels that I have worked with, both are excellent for different reasons:

  • ISPConfig – This control panel system runs on a BSD license and can run on several linux systems. Here is list of features from ISP Config: https://www.ispconfig.org/ispconfig/services-and-functions/
  • Virtualmin – This hosting software runs on GPL license and supports several operating systems, though mileage may vary. Here is a list of Virtualmin features.

Both hosting systems have online communities, and I would highly recommended checking them out before installing to get a feel of what’s they are like; if you have an issue the community boards are best place to solve them.

Regarding the setups, much of the email set up is automated once you get the system up and running, and most of the configurations are ‘hardened’ by default, erring on the side of security.

Further reading:

These links range from the philosophical, to the technical to the practicality of moving and changing you’re email account. If you are deciding to make a change in your email lifestyle ponder upon some of these reads:

Finally, let me conclude with some final thoughts from legendary computer scientist Don Knuth;

I have been a happy man ever since January 1, 1990, when I no longer had an email address. I’d used email since about 1975, and it seems to me that 15 years of email is plenty for one lifetime.
Freeing your Mobile: GrapheneOS / Pixel 3a XL review

Posted by on Mar 13 2020

Until recently, there hasn’t been any variety to mobile phone operating systems; you either in the Apple IOS camp or Android. Android is heavily spying on everything you do on your mobile. A simple bike ride while you are on your mobile my land you in trouble with the law. IOS unfortunately doesn’t fare much better.

There are 2 leading alternatives to free and open mobile phone movement – GrapheneOS and Libre5. Both have different takes on how they define free and open. GrapheneOS is an open version of Android that is not bound to the Google Play store and other Google products. It can be installed in Pixel Phones, with the hopes of more phones coming in the future. It can support many apps on that were on Android, though some much better than others.

Libre5 on the other hand, is a complete rebuild of the mobile phone. Libre wanted to ensure that they entire phone hardware ecosytem was free and open, not just the software. This means coming up with new OS and fewer apps out of the box, but a more complete security package.

I recently bought Pixel 3a XL a mobile and installed the GrapheneOS on it. I have written this from beginners perspective. But here are a couple to consider before trying to switch.

  • Don’t expect bell’s and whistles – this operating system was built with security in mind, not flashiness. It is not a ‘status’ phone.
  • You won’t find major apps available from Google or Facebook. Also other apps like Uber, with its location tracking, will not work. This may be a deal breaker for many people

Here is my simple review with the good and bad, starting with the cons:

GrapheneOS – The Bad

The install. The install is not for the lighthearted, it is likely the main reason it probably will not be accepted by the mainstream. It can be installed from either a windows or linux system. I had set aside an afternoon to install it from a linux ubuntu laptop, since I was unfamiliar with the process.

There are several videos on the install, one of the most popular being the one by the Ethical Developer Group on youtube. There are detailed instructions on the GrapheneOS website, and a user community at Reddit.

However, I kept running into problem. Its the first time I ever install an OS on mobile device, so it ended up taking me about 4 hours before I figured it out. In the end it turned out a made a simple mistake because I had misread part of the installation instructions.

Support – There is no official support, so the primary place to find answers is the Reddit community and internet searches. Your mileage may vary with this, sometimes you’ll friendly tips, and in other cases you’ll get RTFM. I went into this knowing I would be on my own, so this is not a big deal for me. For non-technical people dealing with this type of community can be daunting as a lot of jargon is thrown around.

Camera – The camera, while adequate, is not up to spec with other OS’s. I imagine this is a pretty low priority for GrapheneOS. The Pixel 3a XL actually has an excellent camera, but unfortunately the software doesn’t make full use of the hardware.

Graphene OS – The Good

The look and feel – While there is nothing super exciting about GrapheneOS right out of the box, it is very familiar. This is a good thing: if you already know Android, then you can get to customising this immediately. Things just seem to work. I popped in my SIM card, viola, it worked.

Installing Apps – There is no Google play store. This may seem like a bad thing, but once you get used it, its very easy. Remember running .exe files on Windows? Installing apps is a lot like that, via APK files (android package kit). In this sense, there is no gate keeper, you can pretty much install anything if you find its APK file.

That however installing everything is two-edged sword. It likely that some apps will not work at all (particularly those reliant on the Google Play store). Others may do your computer harm. I would recommend install the app F-Droid first. This is ‘store front’ app that contains only free and open software, these will likely work best on your GrapheneOS.

In short you have freedom to install anything you want, but you have to be careful with that freedom. I think this is a very good thing.

Peace of mind This may seem like a strange benefit from a mobile device. Ultimately, if I want personal mobile device, I want to keep it my data on it personal. The security features are solid, and I know I can control the apps on my phone.

In addition, there is a personal sense of satisfaction that I installed the operating system myself. I know what is there on my phone.

Finally, an interesting comment from a parent: He liked the idea of having mobile phone in which Facebook was not available, and would not work properly if they tried to install it on their mobile device.

GrapheneOS Verdict

I fully recommend GrapheneOS for on the Pixel 3a XL.

I really like this phone, and after a few days it has already become my main phone. It’s not a perfect transition, I will still use my other phone for its camera as well as Uber or Lyft (if in a pinch). For me its not that big of a deal, for others it might be a deal breaker.

I don’t imagine that GrapheneOS will have a big following outside the tech community in New Zealand, however it is my hope that others discover that there is more than just Google Android and IOS. The installation is probably a barrier for many: in the past you could put a disk (or usb drive) and install a new system. Unfortunately, mobile Operating Systems are not that streamlined yet.

My hope is that others here in New Zealand will give it a ‘hoon’ and in the future, perhaps even contribute to the GrapheneOS project.

Swift, Nginx, Perfect, & PerfectMustache

Posted by on Mar 07 2020

This is a quick start guide on getting started with Swift and the Perfect framework. In a previous guide, we showed how to run Swift Perfect and Nginx together: Perfect handles the dynamic code, and Nginx handles the static files.

Today we are going to use the templating system within Perfect, called PerfectMustache. This is a more involved guide that has a lot of moving parts. If unfamiliar with templating systems, watch [Ray Wenderlich’s excellent introduction to PerfectMustache][1]). Its a great back up if you are ever stuck on anything here! Also check out [Perfect’s perfect blog template][2]).

One thing to note – I mostly just show the code, which very little explanation. I encourage you to fill in the gaps. This is mostly to try to keep things moving along. Check out Swift’s documentation on sections you don’t understand.

Will create 2 very basic webpages – the first will loop through names of birds, the second will display more info on the bird.

394-5685818

395-3638661

Here’s a summary of steps to accomplish this task:

  1. Install PerfectMustache
  2. Create Mustache Templates & static files
  3. Set up Swift Template
  4. Create PerfectMustache Functions
  5. Create Handlers for our pages
  6. Create a new routes
  7. Configure Nginx to handle Mustache So put on your favourite music and grab your favourite beverage – let’s do this 🙂

Install PerfectMustache

Check the instructions at [Github](https://github.com/PerfectlySoft/Perfect-Mustache) if you run into any issues. Within your PerfectTemplate folder you should see a Package.swift file, open this and add the dependency and target configuration.

  • Dependency: .package(url: “https://github.com/PerfectlySoft/Perfect-Mustache.git”, from: “3.0.0”)
  • Target Configuration: .target(name: “PerfectTemplate”, dependencies: [“PerfectHTTPServer”, “PerfectMustache”])

Your Package.swift should look something like this:

// swift-tools-version:4.2

import PackageDescription


let package = Package(
    name: “PerfectTemplate”,
    products: [
        .executable(name: “PerfectTemplate”, targets: [“PerfectTemplate”])
    ],
    dependencies: [
        .package(url: “https://github.com/PerfectlySoft/Perfect-

    HTTPServer.git, from: “3.0.0”),
        .package(url: “https://github.com/PerfectlySoft/Perfect-Mustache.git”, from: “3.0.0”),
    ],
    targets: [
        .target(name: “PerfectTemplate”, dependencies: [“PerfectHTTPServer”, “PerfectMustache”])
    ]
)

Create Mustache Templates & static files

In our last tutorial, we create a virtual directory on our local machine at /var/www/swift.local/html. You can download the [base files from my site](https://kraxn.io/files/perfectmustache+images.tar.gz), it contains the follow:

  1. mustache folder containing index.mustache, and style.mustache. These don’t have mustache markup yet, we are going to write them in.
  2. images folder containing sparrow.jpg, starling.jpg, swallow.jpg, swift.jpg.

Just extract the perfectmustache+images.tar.gz directly into the html folder.

Set up Swift Template.

We will be using the template from the last Perfect/Nginx tutorial: We before we get to the guts of Mustaching, Routing and Handling, we have to set up few things:

  • Add the PerfectMustache Library: import PerfectMustache
  • Add the path to document root: we will use this path to access the mustache templates as an immutable variable.
  • Add a data dictionary – This is an array containing dictionaries of birds. The image files you added earlier are needed for this.
  • Delete the contents of func handler. We will be working on later.

This is our updated swift.main:

import PerfectHTTP
import PerfectHTTPServer
import PerfectMustache

  //our document root<
  let docRoot = “/var/www/swift.local/html/”


  //our bird data
  var birds = [

  [<a href="">name</a>“sparrow”, <a href="">family</a>“Passeridae”, <a href="">wiki</a>“https://en.wikipedia.org/wiki/Old_World_sparrow”, <a href="">image</a>“sparrow.jpg”, <a href="https://kraxn.io/true">progLang</a>,

  [<a href="">name</a>“starling”, <a href="">family</a>“Sturnidae”, <a href="">wiki</a>“https://en.wikipedia.org/wiki/Starling”, <a href="">image</a>“starling.jpg”, <a href="https://kraxn.io/false">progLang</a>,

  [<a href="">name</a>“swallow”, <a href="">family</a>“Hirundinidae”, <a href="">wiki</a>“https://en.wikipedia.org/wiki/Swallow”, <a href="">image</a>“swallow.jpg”, <a href="https://kraxn.io/false">progLang</a>,

  [<a href="">name</a>“swift”, <a href="">family</a>“Apodidae”, <a href="">wiki</a>“https://en.wikipedia.org/wiki/Swift”, <a href="">image</a>“swift.jpg”, <a href="https://kraxn.io/true">progLang</a>,

  ]

  func handler(request:HTTPRequest, response:HTTPResponse) {
  //swift code arriving soon!
  }

  var routes = Routes()
  routes.add(method: .get, uri: “/”, handler: handler)

  try HTTPServer.launch(name: “localhost”,
    port: 8181,
    routes: routes,
    responseFilters: [(PerfectHTTPServer.HTTPFilter.contentCompression(data: [:]), HTTPFilterPriority.high)])

Perfect Mustache Function

Here is a stuct containing the function for interlacing Swift code and mustache template code. This code was taken verbatim from [Ray Wenderlich’s youtube video on PerfectMustache](https://www.youtube.com/watch?v=V98kYKD_R7s).

struct MustacheHelper: MustachePageHandler{


  var values: MustacheEvaluationContext.MapType

  func extendValuesForResponse(context contxt: MustacheWebEvaluationContext, collector: MustacheEvaluationOutputCollector) {

  contxt.extendValues(with: values)


do {
    try contxt.requestCompleted(withCollector: collector)
      } catch {
        let response = contxt.webResponse
        response.appendBody(string: “(error)”)
        .completed(status: .internalServerError)
        }
    }
}

Let’s add this to main.swift:

import PerfectHTTP
import PerfectHTTPServer
import PerfectMustache


  //our document root
  let docRoot = “/var/www/swift.local/html/”

  //our bird data
  var birds = [

  [<a href="">name</a>“sparrow”, <a href="">family</a>“Passeridae”, <a href="">wiki</a>“https://en.wikipedia.org/wiki/Old_World_sparrow”, <a href="">image</a>“sparrow.jpg”, <a href="https://kraxn.io/true">progLang</a>,

  [<a href="">name</a>“starling”, <a href="">family</a>“Sturnidae”, <a href="">wiki</a>“https://en.wikipedia.org/wiki/Starling”, <a href="">image</a>“starling.jpg”, <a href="https://kraxn.io/false">progLang</a>,

  [<a href="">name</a>“swallow”, <a href="">family</a>“Hirundinidae”, <a href="">wiki</a>“https://en.wikipedia.org/wiki/Swallow”, <a href="">image</a>“swallow.jpg”, <a href="https://kraxn.io/false">progLang</a>,

  [<a href="">name</a>“swift”, <a href="">family</a>“Apodidae”, <a href="">wiki</a>“https://en.wikipedia.org/wiki/Swift”, <a href="">image</a>“swift.jpg”, <a href="https://kraxn.io/true">progLang</a>,

  ]


  //Mustache function
  struct MustacheHelper: MustachePageHandler{

  var values: MustacheEvaluationContext.MapType

  func extendValuesForResponse(context contxt: MustacheWebEvaluationContext, collector: MustacheEvaluationOutputCollector) {

  contxt.extendValues(with: values)

  do {
    try contxt.requestCompleted(withCollector: collector)
      } catch {
        let response = contxt.webResponse
        response.appendBody(string: “(error)”)
        .completed(status: .internalServerError)
        }
    }
  }

  func handler(request: HTTPRequest, response:HTTPResponse) {
  //swift code arriving soon!
  }

  var routes = Routes()
  routes.add(method: .get, uri: “/”, handler: handler)


try 

HTTPServer.launch(name: “localhost”,
    port: 8181,
    routes: routes,
    responseFilters: [(PerfectHTTPServer.HTTPFilter.contentCompression(data: [:]), HTTPFilterPriority.high)])

Modify our default handler and add mustache markup

Let’s change our default handler; this already has a route linked to it which is the root page (or homepage). In summary, we will:

  • map var values so they can squeeze into our mustasche template
  • assign our birds array to the values
  • pass this information to our MustacheHelper. Here it’s important to note that we created the docRoot variable so we can find our mustache files.

Here’s our the handler code:

func handler(request:HTTPRequest, response:HTTPResponse) {

    var values = MustacheEvaluationContext.MapType()
    values[“birds”] = birds


  mustacheRequest(request: request, response: response, handler: MustacheHelper(values: values), templatePath: docRoot+“mustache/index.mustache”)

}

Now that we passed the array to our MustacheHelper, we need to make sure that our index.mustache template receives it. In our our case, we only want to grab the bird name. Here we loop through the birds data, just grabbing the names from our dictionary. We create a new link to /hello{{name}} – we will create this page next. Here’s what it should look like:

    <!doctype html>
    <head>
    <meta charset="utf-8">
    <title>{{name}}</title>
    </head>
    <body>

    <div id="content">
            {{#birds}}
    <div style="padding-bottom: 20px; border-bottom: 1px solid black">
                <h4><a href="/hello/{{name}}">{{name}}</a></h4>
            </div>
            {{/birds}}  
        </div>
    </body>
    </html>

to compile and start the server:

swift build
.build/debug/PerfectTemplate

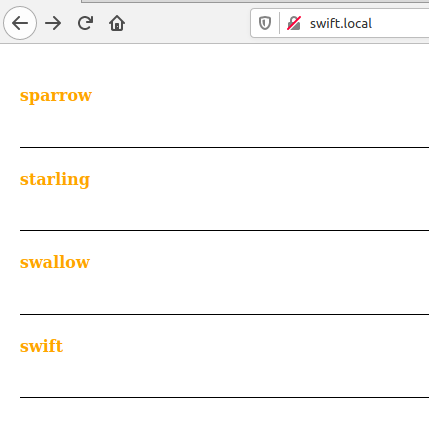
If everything went according to plan, you should be able to go to your http://swift.local and see this:

394-5685818

Create a new route, handler, and mustache mark up.

Let’s create that info page. First thing we should is create a route that will take us to the page. This will take us to the url ‘hello/{name}’‘, where name will be passed from page in the url.

routes.add(method: .get, uri: "hello/{name}", handler: birdHandler)

This a new handler, which we name birdHandler. Here’s what this does in summary:

  • captures the response “name” with error catching
  • loop through birds array to find the request bird
  • if requested bird is found, return the entire dictionary back to mustache

func birdHandler(request: HTTPRequest, _ response: HTTPResponse) {

   guard let name = request.urlVariables[“name”] else { response.completed(status: .badRequest)    return
    }    

  var values = MustacheEvaluationContext.MapType()

     for item in birds {

       if ( item[“name”] as? String == name )
           { 
               values = item
            }
    }
mustacheRequest(request: request, response: response, handler: MustacheHelper(values: values), templatePath: docRoot+“mustache/index.mustache”)

}

Now, lets do the mustache markup. We are going to be reusing the index page. Here is a summary:

  • Our hello/{{name}} doesn’t have the birds array, so we are going to provide a conditional statement to catch this.
  • We can now populate the page with data from our specific bird.
  • We have a conditional state on progLang to see if our bird name is a programming language or not.
    <!doctype html>
    <head>
    <meta charset="utf-8">

    <p><title>{{name}}</title><br />
    {{> style}} <br />
    </head>
    <body></p>


    <p> <div id="content">
    {{#birds}}
    <div style="padding-bottom: 20px; border-bottom: 1px solid black">
    <h4><a href="/hello/{{name}}">{{name}}</a></h4>
    </div>
    {{/birds}}
    {{^birds}}
    <h2>My bird name is {{name}}</h2>
    <p>Family: {{family}} </p>
    <p>Wiki Link: <a href="{{wiki}}">{{name}} info</a></p>
    <p><img src="/images/{{image}}"> </p>
    <p></p>

    <p>            {{#progLang}}
    {{name}} is also a programming language.
    {{/progLang}}</p>

    <p>             {{^progLang}}
    {{name}} is sadly not a programming language.
    {{/progLang}}</p>


    </p>
    a complete list of <a href="/">birds</a>
    {{/birds}}      
    </div>
    </body>
    </html>

to compile and start the server:

swift build
.build/debug/PerfectTemplate

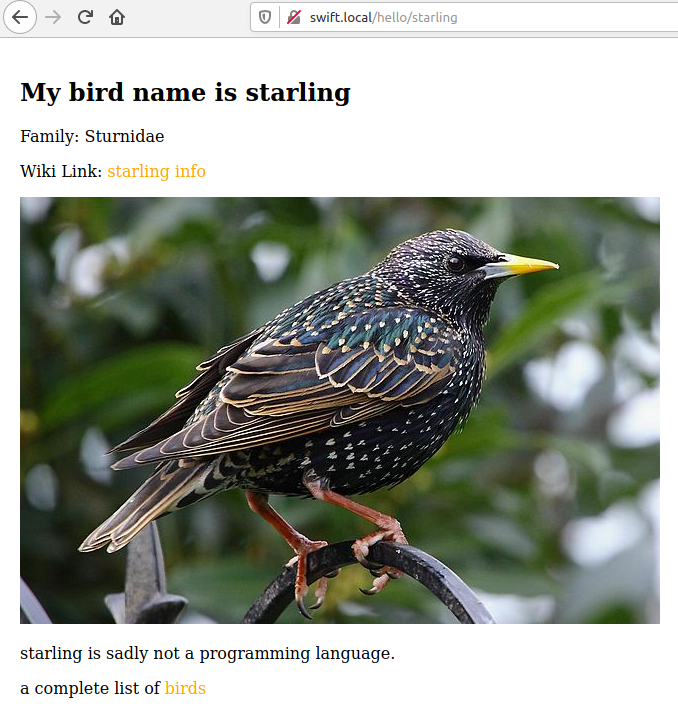
If everything went according to plan, you should be able to go to your http://swift.local/hello/starling and see this:

395-3638661

Adding ‘mustache’ static files to Nginx

Finally, .mustache files are still served by Perfect server. Let’s move those over to Nginx, since they are static files. Change this line in your /etc/nginx/conf.d/swift.local.conf :

        # serve static files
        location ~ ^/(images|javascript|js|css|mustache|media|static)/  {
          root /var/www/swift.local/html;
          expires 30d;
        }

afterwards test and reload:

sudo nginx -t
sudo systemctl reload nginx

Viola! Here is the final main.swift file for reference:

import PerfectHTTP
import PerfectHTTPServer
import PerfectMustache


let docRoot = “/var/www/swift.local/html/”

var birds = [

[<a href="">name</a>“sparrow”, <a href="">family</a>“Passeridae”, <a href="">wiki</a>“https://en.wikipedia.org/wiki/Old_World_sparrow”, <a href="">image</a>“sparrow.jpg”, <a href="https://kraxn.io/true">progLang</a>,

[<a href="">name</a>“starling”, <a href="">family</a>“Sturnidae”, <a href="">wiki</a>“https://en.wikipedia.org/wiki/Starling”, <a href="">image</a>“starling.jpg”, <a href="https://kraxn.io/false">progLang</a>,

[<a href="">name</a>“swallow”, <a href="">family</a>“Hirundinidae”, <a href="">wiki</a>“https://en.wikipedia.org/wiki/Swallow”, <a href="">image</a>“swallow.jpg”, <a href="https://kraxn.io/false">progLang</a>,

[<a href="">name</a>“swift”, <a href="">family</a>“Apodidae”, <a href="">wiki</a>“https://en.wikipedia.org/wiki/Swift”, <a href="">image</a>“swift.jpg”, <a href="https://kraxn.io/true">progLang</a>,

]

struct MustacheHelper: MustachePageHandler{

var values: MustacheEvaluationContext.MapType

func extendValuesForResponse(context contxt: MustacheWebEvaluationContext, collector: MustacheEvaluationOutputCollector) {
contxt.extendValues(with: values)


  do {
      try contxt.requestCompleted(withCollector: collector)
} catch {


let response = contxt.webResponse
response.appendBody(string: “(error)”)
.completed(status: .internalServerError)

}
}
}


func handler(request:HTTPRequest, response:HTTPResponse) {


var values = MustacheEvaluationContext.MapType()

values[“birds”] = birds

mustacheRequest(request: request, response: response, handler: MustacheHelper(values: values), templatePath: docRoot+“mustache/index.mustache”)

}

func birdHandler(request:HTTPRequest, _ response:HTTPResponse) {


guard let name = request.urlVariables[“name”] else {
response.completed(status: .badRequest)
return


}

var values = MustacheEvaluationContext.MapType()

for item in birds {

if ( item[“name”] as? String == name )

{
 values = item
}

}

mustacheRequest(request: request, response: response, handler: MustacheHelper(values: values), templatePath: docRoot+“mustache/index.mustache”)

}

var routes = Routes()
routes.add(method: .get, uri: “/”, handler: handler)
routes.add(method: .get, uri: “hello/{name}”, handler: birdHandler)       

try HTTPServer.launch(name: “localhost”,

port: 8181,
routes: routes,
responseFilters: [
                 (PerfectHTTPServer.HTTPFilter.contentCompression(data: [:]), HTTPFilterPriority.high)])

Images were taken from wiki commons – here is the attribution

  1. sparrow: Fir0002 / GFDL1.2 (http://www.gnu.org/licenses/old-licenses/fdl-1.2.html)
  2. starling: Tim Felce (Airwolfhound) / CC BY-SA (https://creativecommons.org/licenses/by-sa/2.0)
  3. swallow: Axel Strauß / CC BY-SA (http://creativecommons.org/licenses/by-sa/3.0/)
  4. swift: Paweł Kuźniar (Jojo_1, Jojo) / CC BY-SA (http://creativecommons.org/licenses/by-sa/3.0/)

FastCGI Perl, NGNIX, insserv and “This account is currently not available.”

Posted by on Mar 05 2020

I have local perl script that runs on FastCGI. Recently my Ubuntu machine died and I have been systematically reinstalling the old scripts. This script came from the following tuturial: https://nginxlibrary.com/perl-fastcgi/

Unfortunately, I got stuck when it got to this part:

insserv perl-fcgi

There do not seem to be any more packages for insserv:

sudo apt-get install insserv
Reading package lists... Done
Building dependency tree       
Reading state information... Done
E: Unable to locate package insserv

by jumping heading and trying to start init.d without it, it got this error:

sudo /etc/init.d/perl-fcgi start
This account is currently not available.

Looking around I found the solution was modifiying the etc/passwd file. While I am not sure if this kosher for live production website, it worked for me:

Unfortunately when I got to the "/etc/init.d/perl-fcgi start" step, I ran into 
the same problem, i.e. "This account is currently not available.". I temporarily 
worked around it by changing the www-data&#39;s shell in /etc/passwd from 
"/usr/sbin/nologin" to "/usr/bash", and although that allowed me to serve 
Perl webpages..

In my case I commented out the www-data user like so and everything worked.

#www-data:x:33:33:www-data:/var/www:/usr/sbin/nologin
# added this as to get local fcgi to work with nginx
www-data:x:33:33:www-data:/var/www:/bin/bash

ssh prompts for passwords despite authorised keys

Posted by on Mar 05 2020

Really short post, on a something that cost me more than 2 hours. I had a hard drive fail, so I had reset servers ssh key to my machine. No matter what, I kept getting prompted for my password.

solution was going through this here: https://unix.stackexchange.com/questions/26371/ssh-prompts-for-password-despite-ssh-authorized-keys

Check ~/ssh folder permissions in client and server machine.
Check /etc/ssh/sshd_config in the server to ensure that RSAAuthentication, 
PubkeyAuthentication and UsePAM options aren&#39;t disabled, 
as they are enabled by default with yes. 

I had PubkeyAuthentication turned off, simple as that.